Setting Up Your ASP.NET Core Development Environment: A Beginner’s Guide
When building ASP.NET Core applications, you’ll need a few key tools to get started efficiently. In this post, we’ll walk through installing:
- Visual Studio
- SQL Server (discussed briefly, detailed later)
- Postman (discussed briefly, detailed later)
We’ll focus mainly on Visual Studio here, ensuring we have the correct workloads, SDKs, and runtimes for ASP.NET Core development.
Overview of Required Components
- Visual Studio – A powerful integrated development environment (IDE) offering code editing, debugging, and built-in terminal features specifically tailored for .NET development.
- SQL Server (to be covered in a future post) – A relational database management system to store application data locally or remotely.
- Postman (also covered in a future post) – A popular tool for testing and debugging APIs, handy when working with ASP.NET Core Web API or microservices.
Visual Studio
1. Downloading Visual Studio
Visit the official Visual Studio website to download the installer. You will see different editions:
- Visual Studio Community (Free, ideal for individuals, open-source, small teams, academic research)
- Visual Studio Professional (Paid, includes additional features for larger teams)
- Visual Studio Enterprise (Paid, includes advanced testing, debugging, and architecture tools)
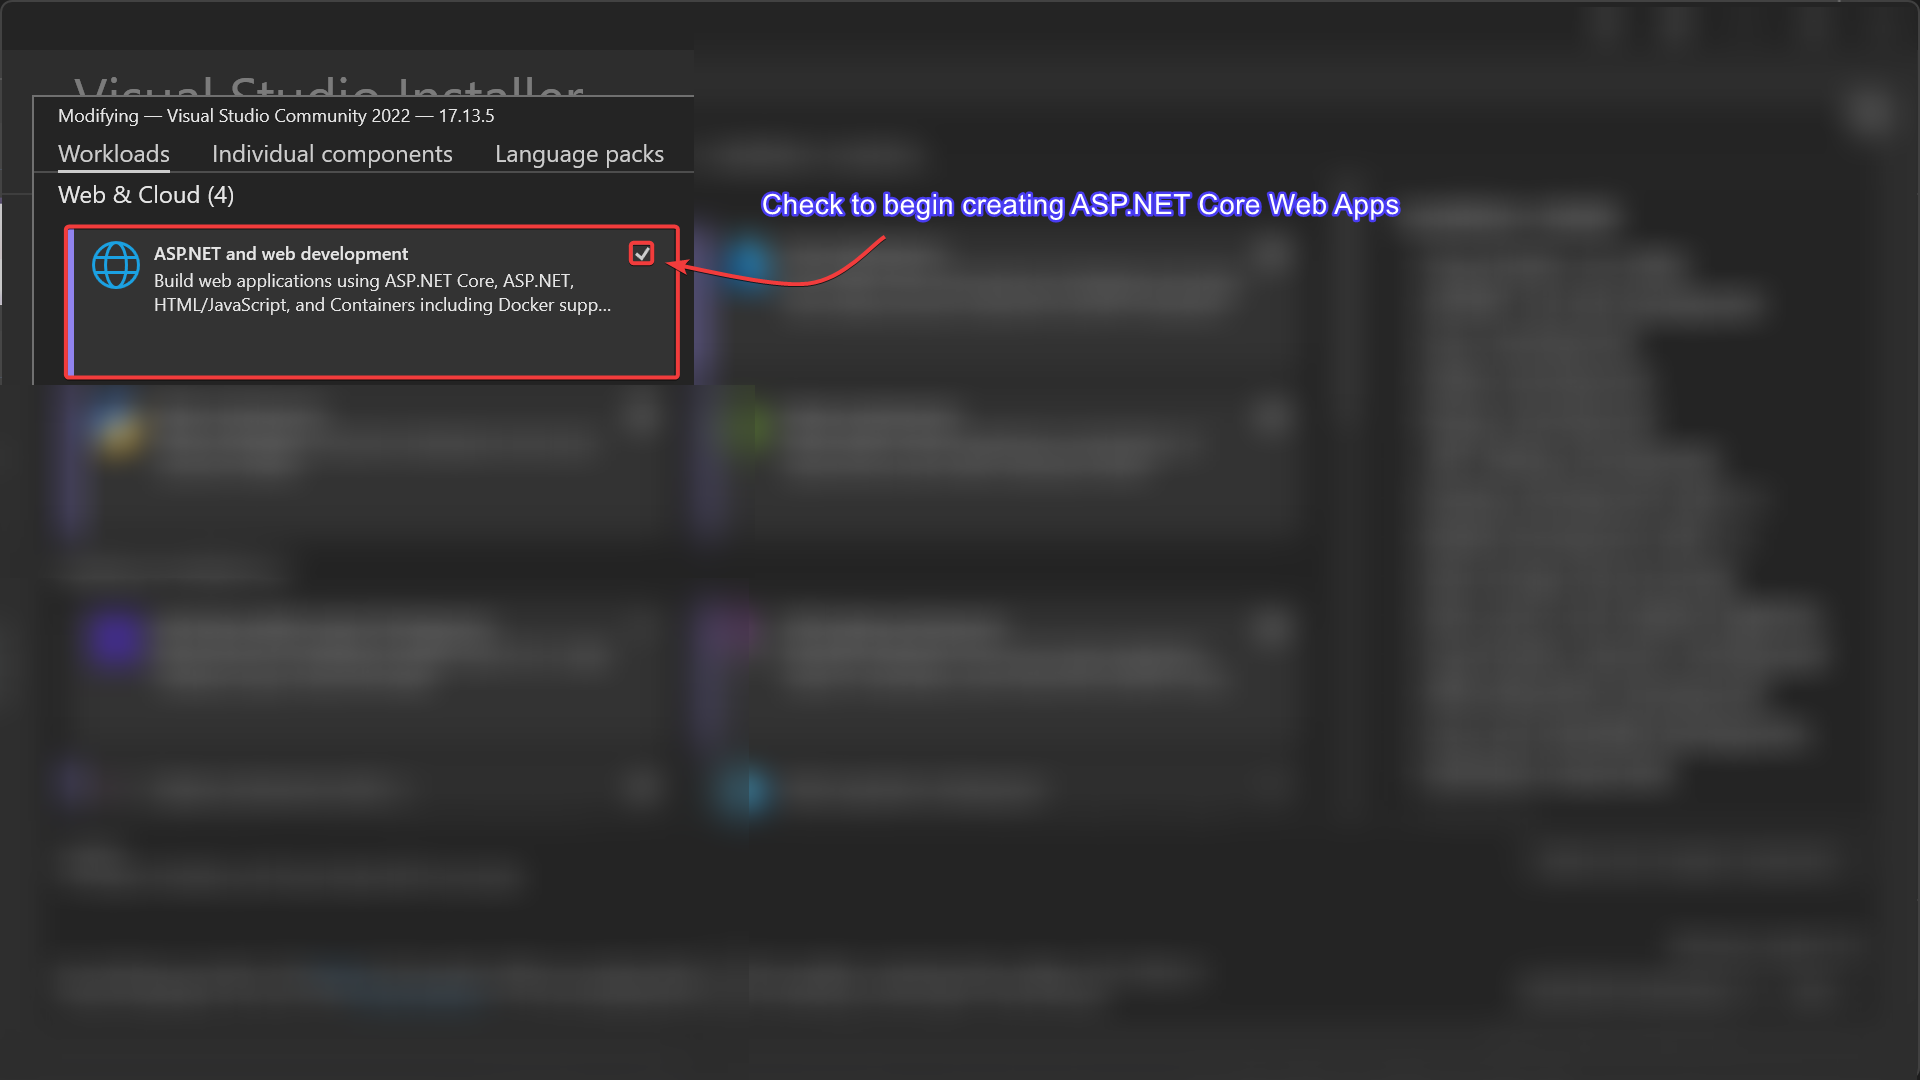
2. Running the Installer
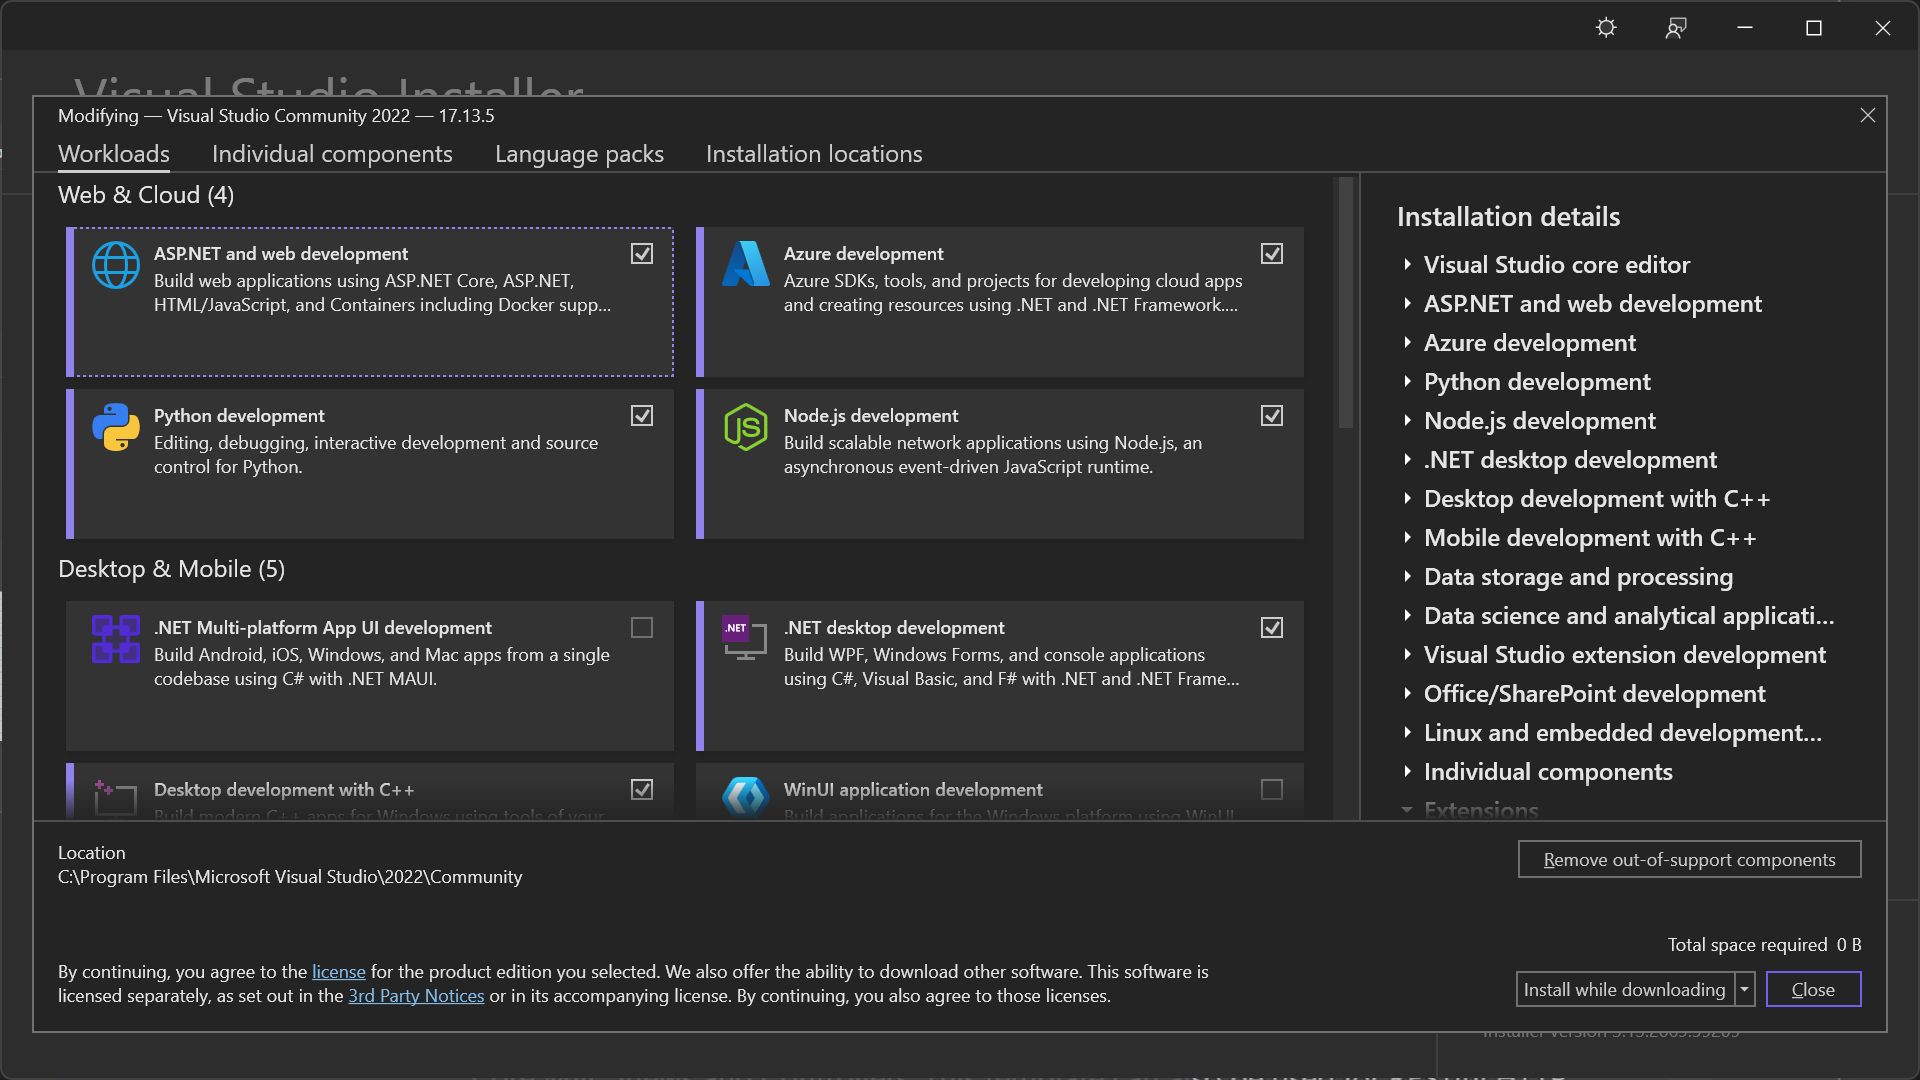
Once you open the Visual Studio Installer, you’ll be prompted to select workloads. For ASP.NET Core development, you should check:
- ASP.NET and web development
- Optional Desktop development with C# if you also plan to build desktop apps.
- Any other workloads that might interest you later.
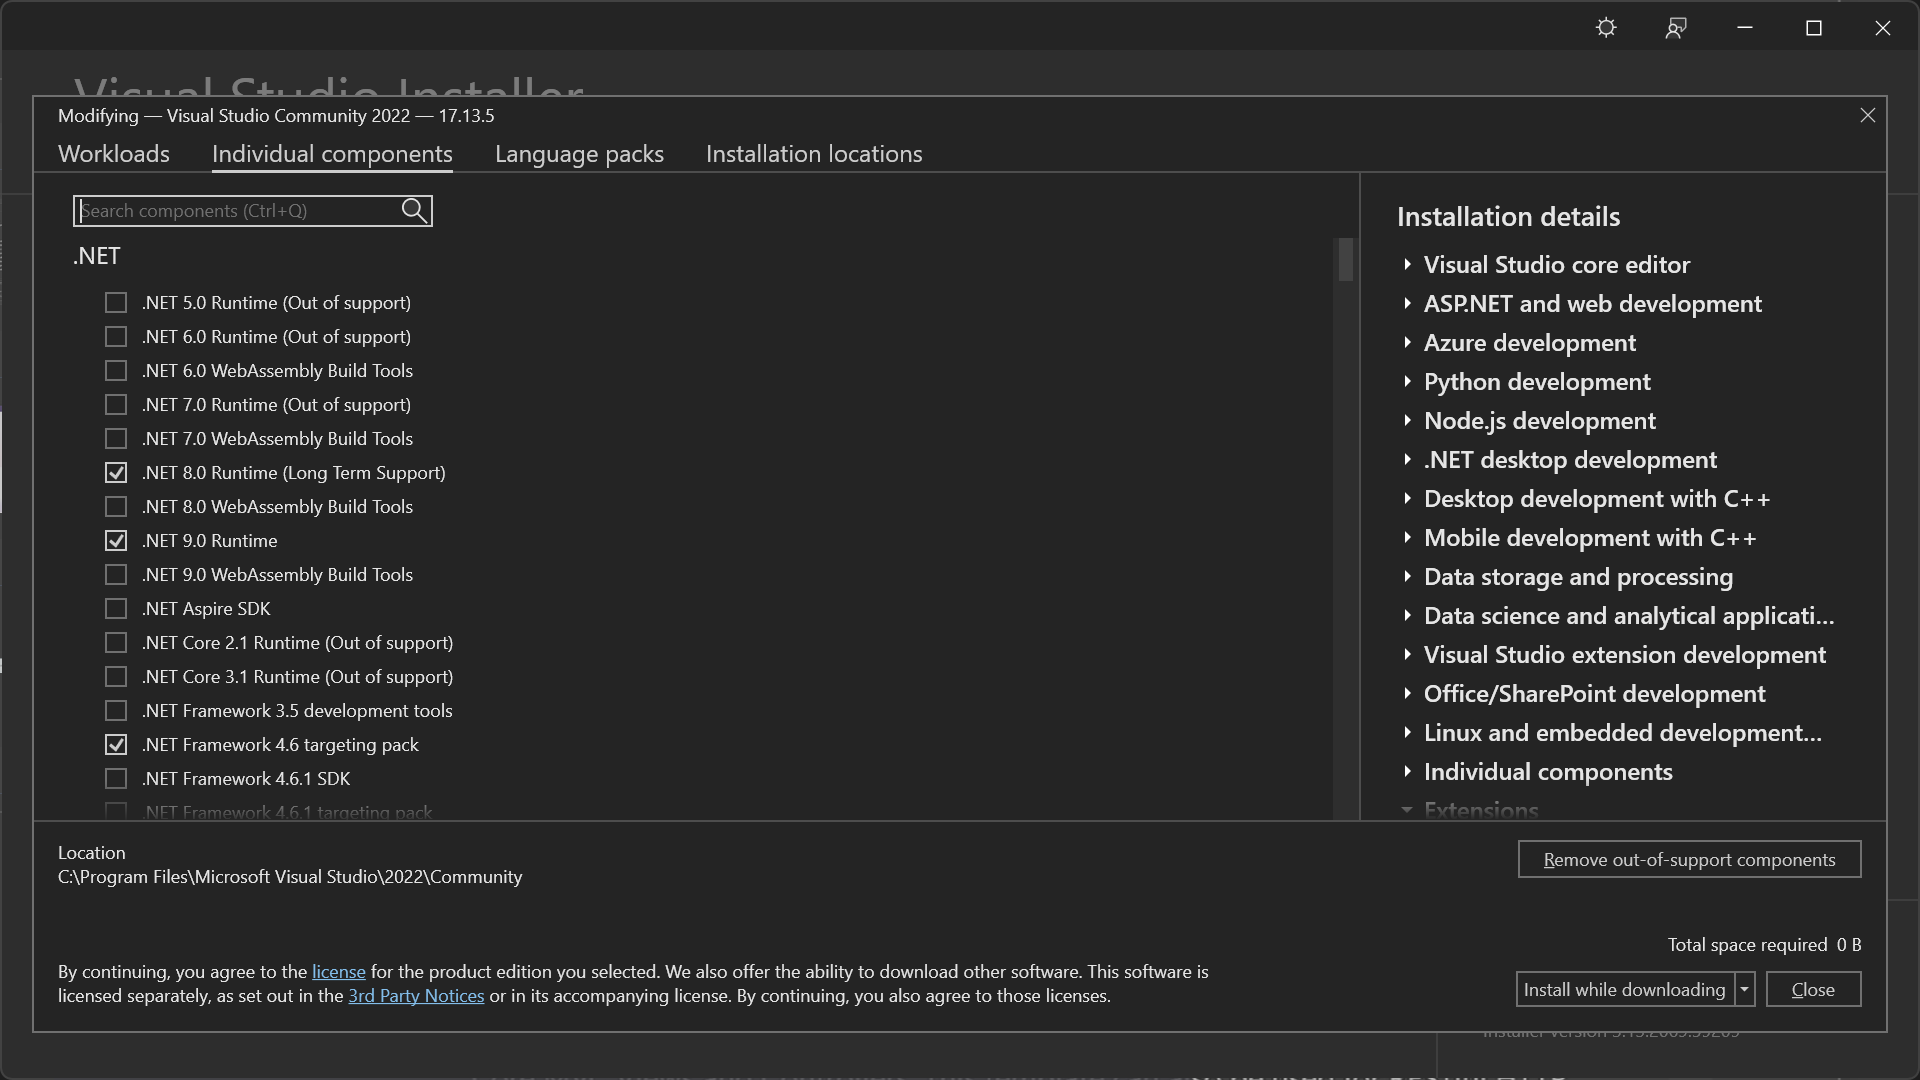
3. Selecting the .NET SDKs and Runtimes
Under the Individual components tab (optional), you can pick which .NET SDKs and runtimes to install.
- By default, Visual Studio will install the latest stable .NET SDK, e.g., .NET 9.0 (or whichever version is current).
- If you want to manage your SDK manually or install it for other editors (like VS Code), check the .NET SDK downloads page.
After installation, you can verify your .NET SDK version:
PowerShell
dotnet --version
dotnet --list-sdks
dotnet --list-runtimes
dotnet --versionshows the default SDK version.dotnet --list-sdkslists all installed SDKs (each version gets its own folder).dotnet --list-runtimeslists all installed .NET runtimes.
Tip: The .NET SDK is typically installed at C:\Program Files\dotnet\sdk. The runtime resides in C:\Program Files\dotnet\shared\Microsoft.NETCore.App.
.NET SDK vs. .NET Runtime
- .NET SDK
- Tools & libraries needed to build .NET apps (including compilers, MSBuild, the .NET CLI).
- Provides templates for creating new projects (
dotnet new). - Usually needed for development machines.
- .NET Runtime
- Minimal environment to run already-compiled .NET apps.
- Needed in production or on any server where you want to execute .NET applications.
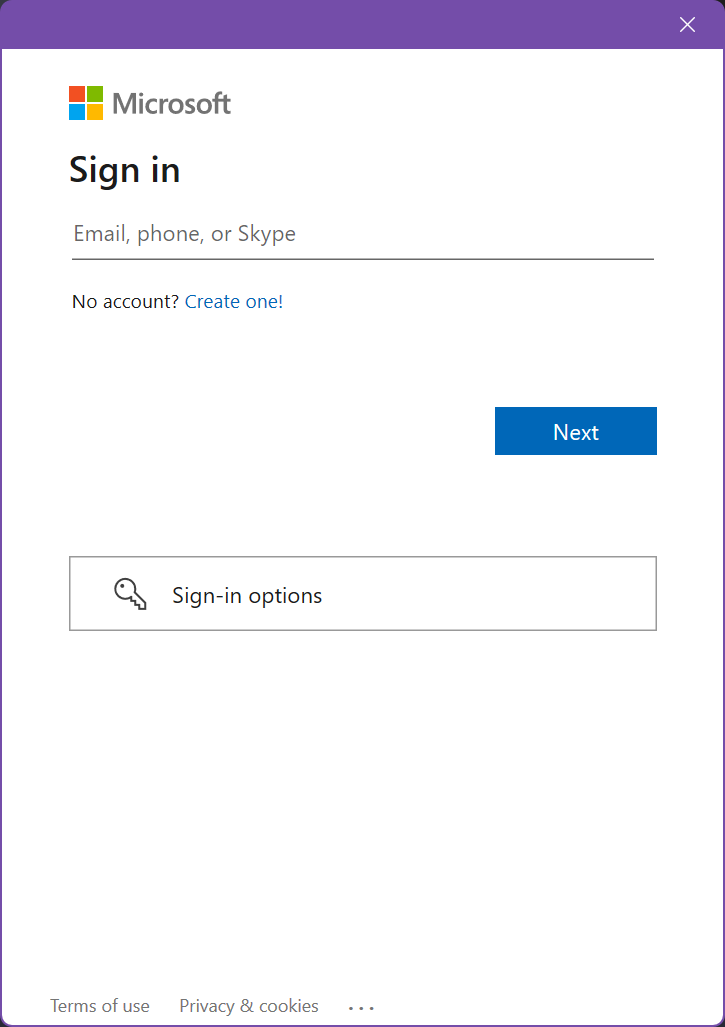
Signing in to Visual Studio
- Required for activating Visual Studio Community.
- Sign in with a Microsoft Account—create one if you don’t have it.
- You can then pick your IDE color theme (light, dark, blue) and development settings profile (e.g., C#).
- If you have an older version of Visual Studio, you can import settings to maintain consistency.
Where to See or Change Installed Workloads
To modify or add components in the future:
- Open the Visual Studio Installer again.
- Select Modify beside your installed instance of Visual Studio.
- Check or uncheck workloads like ASP.NET and web development, .NET desktop development, etc.
SQL Server (Future Post)
We’ll discuss SQL Server in more detail when we start building data-driven applications:
- Downloading (Developer Edition is free for dev/test).
- Installing & configuring on Windows.
- Or using Docker images for cross-platform.
Postman (Future Post)
When we implement ASP.NET Core Web APIs, Postman is invaluable for:
- Sending HTTP requests (GET, POST, PUT, DELETE).
- Debugging request/response data.
- Testing authentication and headers.
We’ll explore installing and using Postman later in the blog series.
Conclusion
With Visual Studio installed (and the right .NET workloads checked), you’re ready to dive into ASP.NET Core development. You can verify everything by running a quick dotnet --version or creating a sample web project in Visual Studio. In upcoming posts, we’ll show you how to create your first ASP.NET Core app—and eventually, how to connect to SQL Server, build APIs, and test them with Postman.
Next Steps
- Launch Visual Studio and sign in to finalize your setup.
- Create a “Hello World” ASP.NET Core project or run
dotnet new webvia the command line to test your environment.- Stay tuned for our next post where we’ll walk through creating a new ASP.NET Core project step by step.
Thanks for reading! If you run into any issues with installation or configuration, leave a comment below.
Powered by Froala Editor